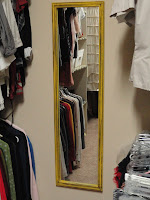
THE DIY MIRROR IMPROVEMENT
 So there is this mirror that I had put in my closet, and it was so oh-hum BORING. But it served a purpose. Well ever since I found this granny chic shelf liner at my local TJ Maxx store (don't judge, my closet is stuck in beige-ville and I'm too lazy to paint that monster.) I've been working on giving my closet the extra flair it needed. So this weekend, I decided to tackle the mirror. You know the kind of mirror I'm talking about. Yep, that's him right there, beige & boring. So I took measurements and took myself to Lowes.
First I cut the trim using a miter box at a 45 degree angle with the measurements I had taken.
After that I primed the cut pieces Zinsser Spray Primer.
I then applied liquid nails to the back of the cut trim. I clamped each piece to the mirror .

After about 5-10 minutes of dry time, I filled the gaps of the corners with Spackle. I used what I had on hand which was probably the cheapest dry-wall Spackle you can find out there. I then re-clamped all the corners.
 After another 5 minutes or so, I used a clear caulk in between the seams of the original mirror and the new trim. Make sure the caulk that you use is paint-able. The one here goes on white so you can see it, then dries clear.
You have to wait about 2 hours for the caulk to dry all the way through. At this point, I did some laundry.
***PROCESSING***
Now look at that handsome devil! I spray painted the new frame Valspar Gold Abundance. I used Mandy's glaze technique found here. The difference, I used Martha Stewart specialty glaze in Black Coffee. The closet revamp looks that much more complete.
For reference I recommend Lowe's for unfinished wood trim, Home Depot had a lousy selection. That completes this weekends project. Bis dann!
-S-


No comments:
Post a Comment